Showing posts with label sewing with paper. Show all posts

Thursday, September 20, 2012

September BBA Challenge: New Technique

The September Blogging Business Artisans challenge is to attempt a new medium or technique. We did this challenge earlier in the year, and Nancy liked it so much that she brought it back. As some of you know, I've been fascinated by sewing with paper this year. I've also been taking my photography to a new level. I love mixed media, but I've never done much with it myself. I have mention that I saw this post this summer and haven't stopped thinking about it since. Finally, I've had this yearning for a few months to do something with turquoise and red decor in our house. It was time to bring all of that together for a brand new project.

A couple disclaimers:
  • This is not a $5 or less DIY project that comes together in half an hour.
  • This is not a comprehensive tutorial with step by step directions and photos. I will walk you through my basic creation process, which will give you most of the tools that you need to attempt a similar project on your own if you wish.

This project started with this simple photograph. I took this during the summer. This is what it looked like straight out of the camera, unedited. It's a piece of playground climbing equipment.

It is extremely rare that I take a photo with the intention of doing a major editing job on it, but this was one of those occasions. I played around with about half a dozen different edits before I settled on these three for this project.


Crazy transformation, right? It is so hard to know when this kind of editing feels "done," but at some point, you have to feel satisfied and leave it alone.

I chose to have my pictures printed elsewhere in an 8x10" format. You can print them off yourself at home if you like. Once I got them back, I set to work gathering my embroidery thread.
I have a fair amount of embroidery thread stashed away finished cross-stitch projects and the good old days of friendship bracelets so I didn't purchase anything new.

I was extremely nervous about sewing on a photograph. I was worried that it was just going to come out a big crumpled mess. Thankfully it didn't at all. My best advice is to GO SLOW and to brace the photograph against something flat. I used a clipboard.
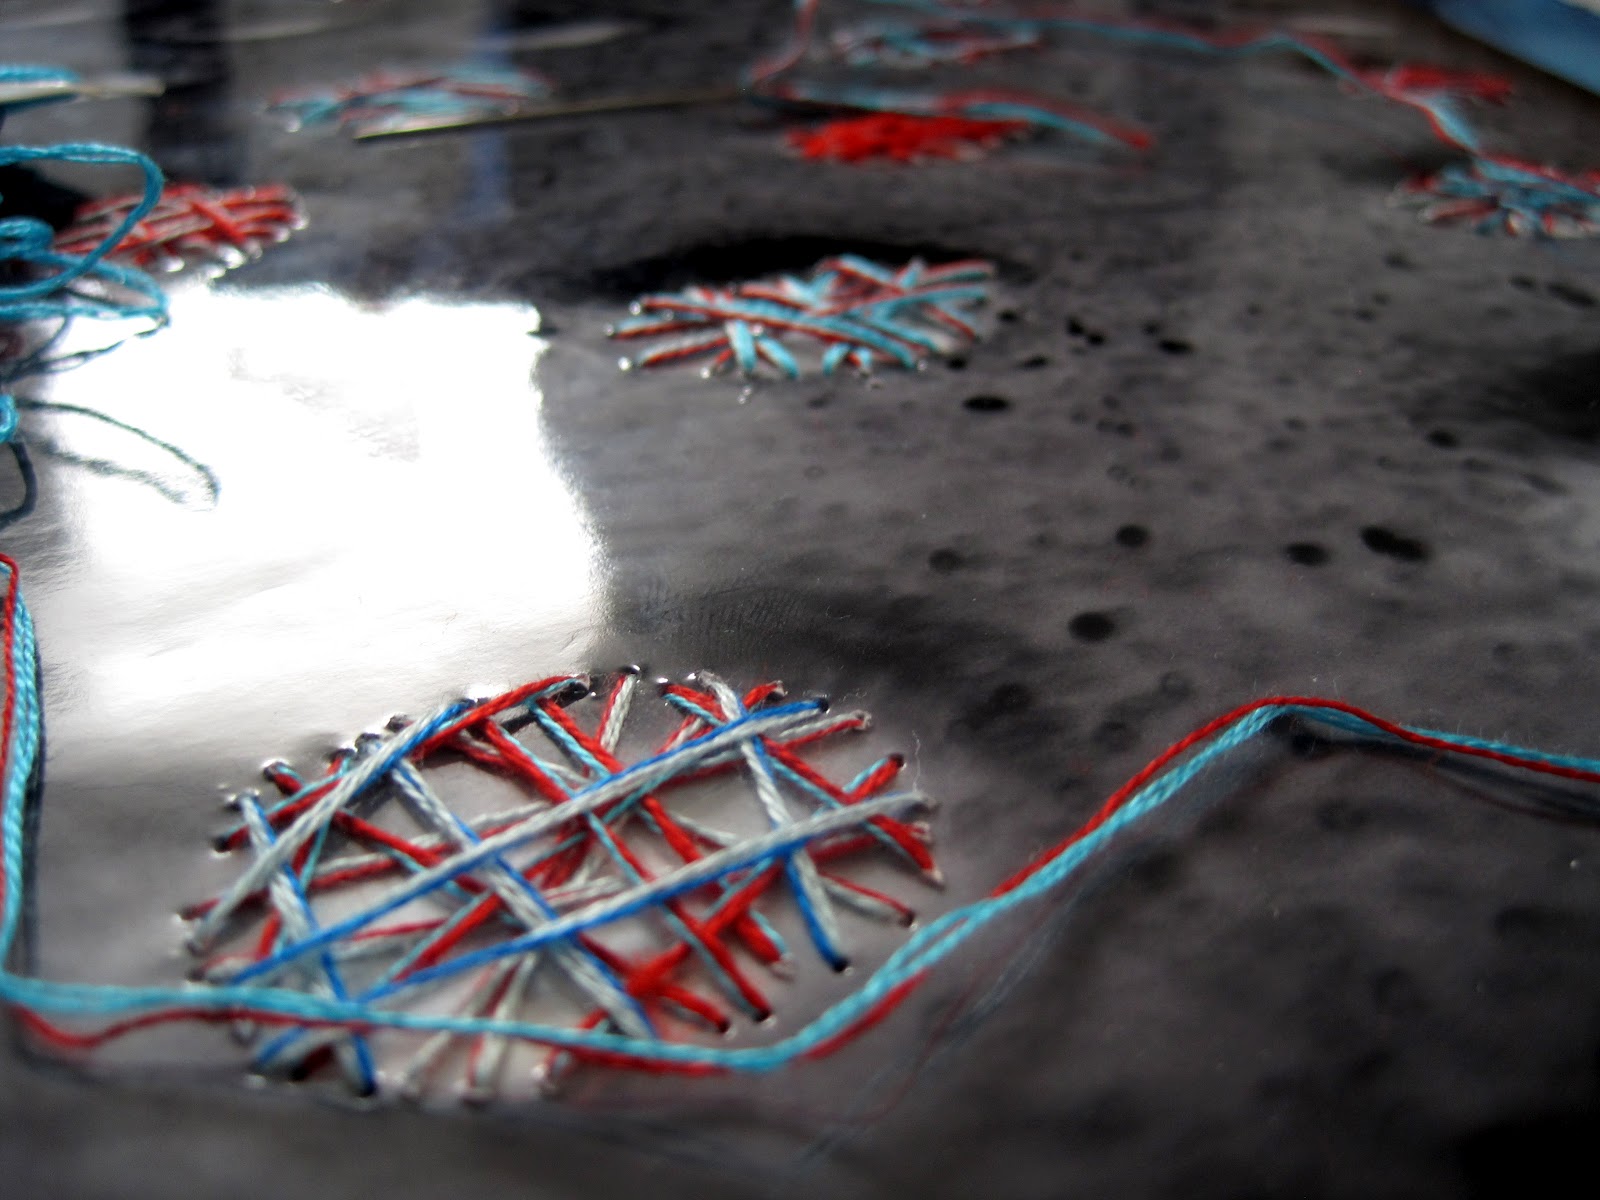
I went into this without much of a game plan. I mixed thread strands as the inspiration struck, and I did my best to keep working my way all the way around each circle.

These large circles were pretty easy to complete. Some of the smaller ones were tricky, especially around the edges of the photograph. I was worried that I'd puncture a big hole right on the edge somewhere. I didn't, though.

I only added embroidery detail to the black and white print. I left the red and blue as is. The next step was to frame them.
I wanted silver frames, but I didn't want to spend months hunting for the perfect ones and then spend a lot of money when I finally found them. I got these frames at Michaels for 55% off with a sale and a coupon. They were about $7 each.

I know that many of my readers use spray paint way more often than I do. If you haven't done something this before, it's pretty simple. Take your frames apart and lay the wooden pieces on newspaper in a well ventilated area. Follow the directions on your spray paint. If you are using a metallic spray paint like I did, beware that you will end up with silver sparkles everywhere. Not a problem, right? We all need a little more sparkle.

When the paint was dry, I put the frames back together with the new prints.

I thought you'd like to see a close up of the embroidered piece in its frame.


I hung them up in my little office area of the basement. Does anyone else still have some of those little prints from university art sales? Those pieces have been with me through a lot of moves.

I can't even begin to tell you how excited I am at the success of this project. I'm also really happy that Jake is psyched about this new wall art. Of course I jumped right in and attempted an 8x10 photo with a lot of stitching and a customized frame job. This is how I usually roll. Now that I've completed a big project, I have some idea for smaller, simpler photo embroidered pieces.

When I ordered these 8x10 prints, among other things, I also ordered some 8x10 prints from our recent trip to the Wisconsin Dells. We have tons of pictures up all over our house, but I haven't added many new ones since we moved here. It was way past time to do that. I got these new prints hung right after I hung my project.

What have you been working on lately that has challenged you?

If this challenge appealed to you and you enjoy blogging on a regular basis, consider joining the Blogging Business Artisans.


Tuesday, February 14, 2012

BBA February Challenge and Our Team Giveaway

Happy Valentine's Day!
Whether or not you are in a committed relationship, I hope that you are loved today.

The Challenge
The February BBA Challenge is to create a love themed item.  You can read more about it here.  If you've been reading this blog for longer a week and/or have checked in with my Etsy shop any time during the past month, you know that I've created a lot of love themed items the past couple months.  My love of hearts took over, and I went crazy for Valentine's Day.

My Valentine's Day shop section is still going strong through tonight so you can check out what's new over there.  I won't recap about any of those items for you.  Instead, for the challenge, I'm going to share some of my newest card designs that I haven't listed yet.
When I started brainstorming card ideas at the end of 2011, I decided that I wanted to design a line of The Office cards.  I don't discuss The Office on here very much, but it's been one of my favorite TV shows for the last 4 years.  I could easily write a whole post about why I love this show, but for now suffice it to say that one of my favorite things about it is the characters and the dialogue.


I have mentioned a few times that I recently started sewing with paper.  I saw a few ideas for this on Pinterest and was immediately hooked.  I learned machine sewing basics many years ago.  Thankfully it's kind of like riding a bicycle so it is coming back to me.  As I become more comfortable with the machine, the sewing goes more quickly.

Anyway, I really love this 3D heart effect.  It is so easy to replicate this concept with any number of shapes.  I will be experimenting more with it in the future.  You'll have to trust me that the background is a beautiful deep purple.  I know that it looks almost black here.  Also, I used some of my new stamps from norajane.

I made a bunch of these (as well as a very similar anniversary version) and will be giving Jake one of them today.  If you know why this card is a fitting choice for him, you get a reward.  Not really.  Just bragging rights.


Thus far I've mostly focused on larger cards, but I'd like to develop more mini sets.  I know that my stitch work here is far from perfect, but I still love this concept and will keep practicing with it.  I think that it would be fun to offer designs that are similar to this for all different occasions.

Someday maybe I'll get inspired to learn how to do something with my sewing machine that's a little more practical.  I can only seem to take interest in sewing projects that are purely for aesthetics.

What have you been working on lately that has challenged you?

The Giveaway
Continuing with the BBA, if you have not already entered the February BBA Giveaway, please get over to the blog and enter!  Nancy and I decided that it would be fun to do a group giveaway and offer lots of smaller prizes.  Seven of our teammates decided to join us.
One lucky person will win all of the items pictured there.  The heart thumb tack set in the upper right hand corner is from me.  We want to encourage everyone to visit all of the participating shops so you can get a lot of extra entries for this giveaway by leaving comments with your favorite items from all of the different shops.

And finally, while I'm on the subject of the BBA, founding the team this fall is what inspired me to write this article.
New Article:
Looking for older articles?  Click here!

I included this post in Erika's It's a Wrap Link Party - 2/20/2012.